Table of Contents
Reference Application Components
This section covers the details of the Reference App’s User Interface (UI) Features, Such as Camera Recording, Wi-Fi, Missing Interface Detection, Touch Pointer, PDF Viewer, Video Player, Date Time Settings, and Theme.
The following image represents the tabs of the Reference App and the relative description sections of each:
Camera Recording
The Display can record video streams from IP cameras (the recording feature for analog cameras can be achieved similarly). The Reference App’s camera module has two methods for starting and stopping the recording, which can be used to record the camera feed dynamically. These functions attach and detach GStreamer’s recording pipeline from the main pipeline at runtime.
Add the following in C++ code to control the camera recording:
Q_INVOKABLE void startRecording (QString startby);
Q_INVOKABLE void stopRecording (QString stopby);
| Important |
|---|
| The startby argument must match with stopby argument. It imposes the condition that only the interface that starts the recording can stop it. |
These methods allow recording to be controlled through multiple interfaces, including CAN, IMU, and Analog input. The Display also detects errors in the IP camera's stream.
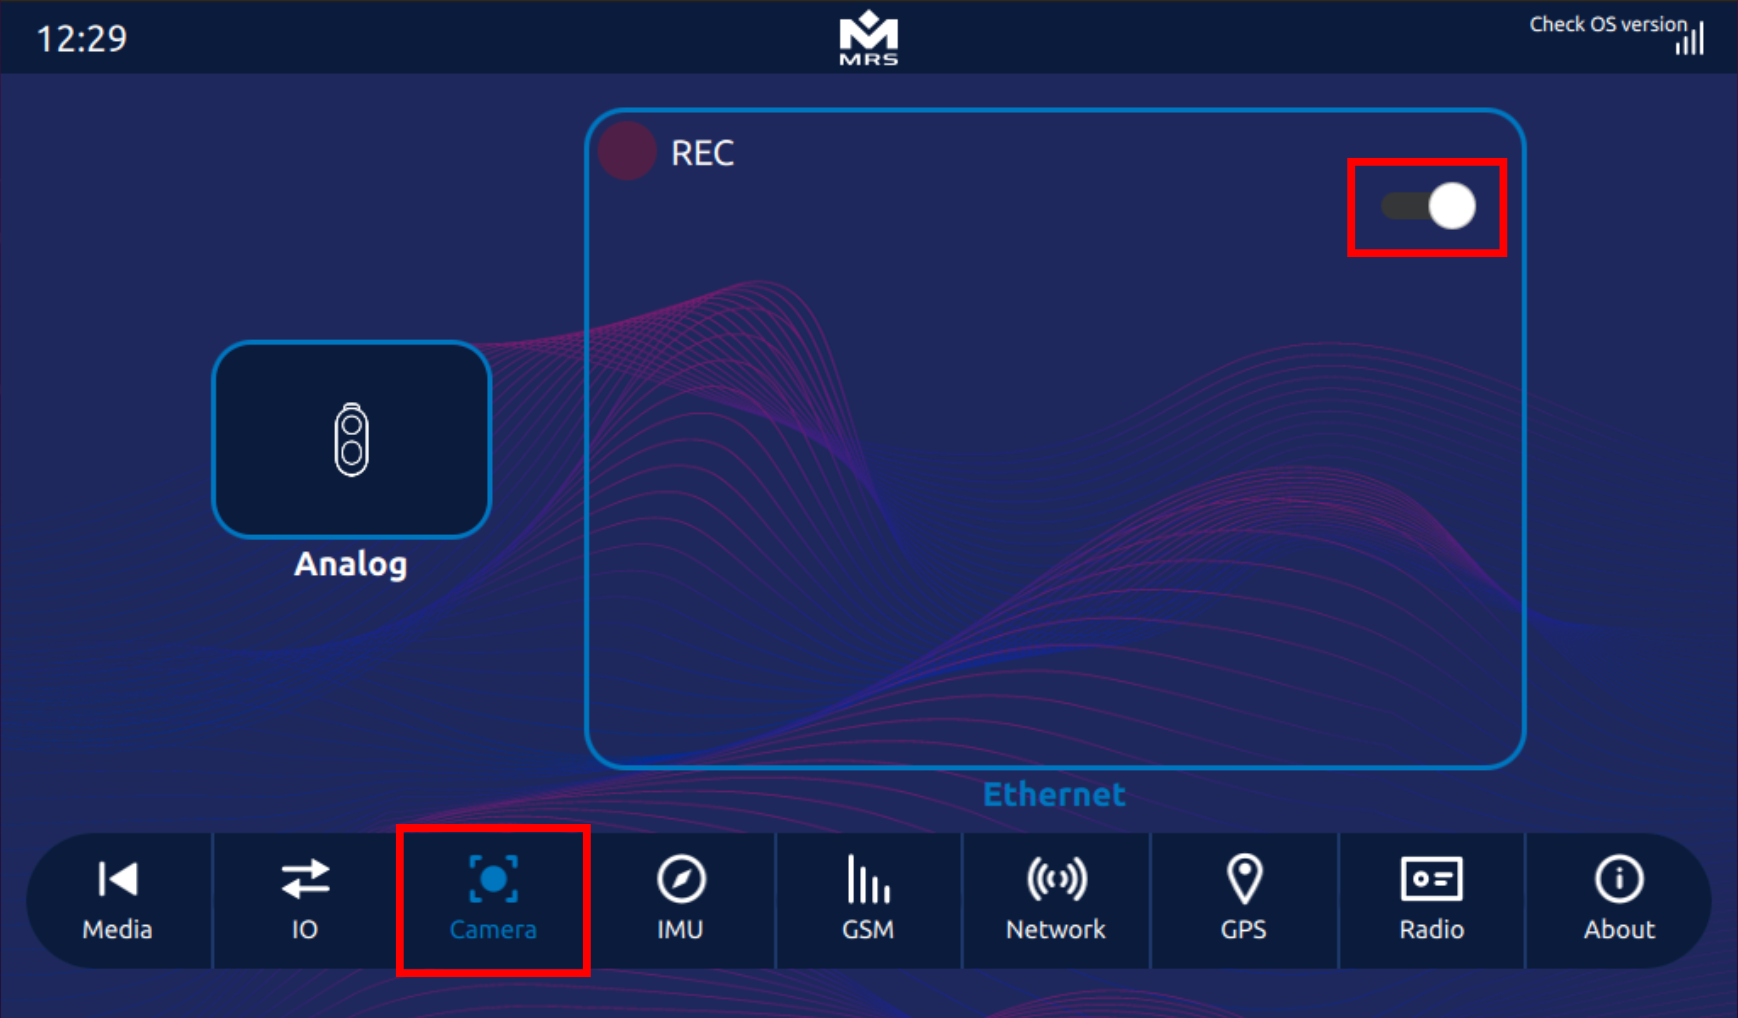
To enable the camera recording in the Reference App, tap on the toggle button in the Camera tab as highlighted below:
 |
|---|
| Camera Recording in the Reference App |
Camera Recording Based on CAN
Recording can start and stop through a CAN message. The first two bytes of the CAN message represent the camera number that needs to be controlled. The next two bytes represent the state of that camera (1 for On and 0 for OFF). The CAN message for recording control is received at 0x201 CAN ID. Following flags of canvideorecording module keeps track of the camera’s recording state based on the CAN message:
int m_recordingCam1;
int m_recordingCam2;
int m_recordingCam3;
int m_recordingCam4;
Camera Recording Based on IMU
The recording can start or stop based on the roll value of IMU. If roll value crosses upper or lower threshold of ±10, the recording starts for ten seconds.
Following flag of imuvideorecording module keeps track of the camera’s recording state based on the IMU value:
bool m_recordingCam1;
Camera Recording Based on Analog Input
The recording can start or stop through an analog input. For this functionality, analog pin 1 is programmed. If the voltage on analog pin 1 exceeds upper threshold (10.8V), the recording starts. Similarly, if the voltage on analog pin 1 drops below lower threshold (10V), the recording stops.
Following flag of iovideorecording module keeps track of the camera’s recording state based on analog input:
bool m_recordingCam1;
| Information |
|---|
| The upper and lower threshold for voltage on the analog pin can be changed as per the user's preferences. For more details, contact MRS Electronic. |
Error Handling for Video Stream
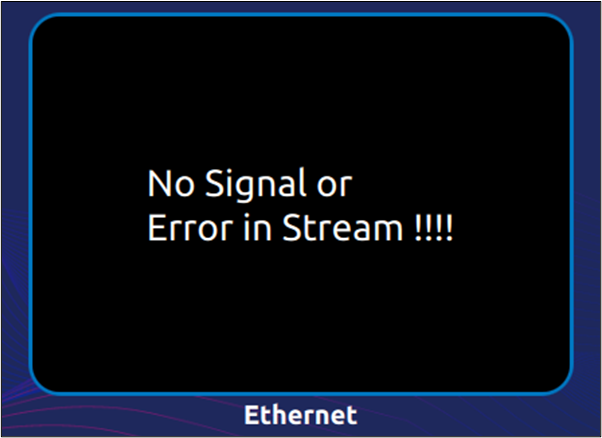
The Display has the functionality to detect errors in the IP camera stream. If it detects an error, an error message displays on the black screen.
 |
|---|
| Error Display Screen for Error Detection in the IP Camera Stream |
Upon resolution of the error, the Display reinitiates the GStreamer pipeline automatically. On the backend, it uses the camera class's startErrorHandling() function. This function runs a repetitive timer at intervals of ten seconds on a separate thread that checks the error message on the gst_bus. The camera class provides the m_isStreaming flag to indicate the status of the stream.
Wi-Fi
The Reference App comes with a Wi-Fi component. To access it, follow the steps below:
- Open the Control Panel by swiping down from the top.
- Tap-and-hold on the Wi-Fi button.
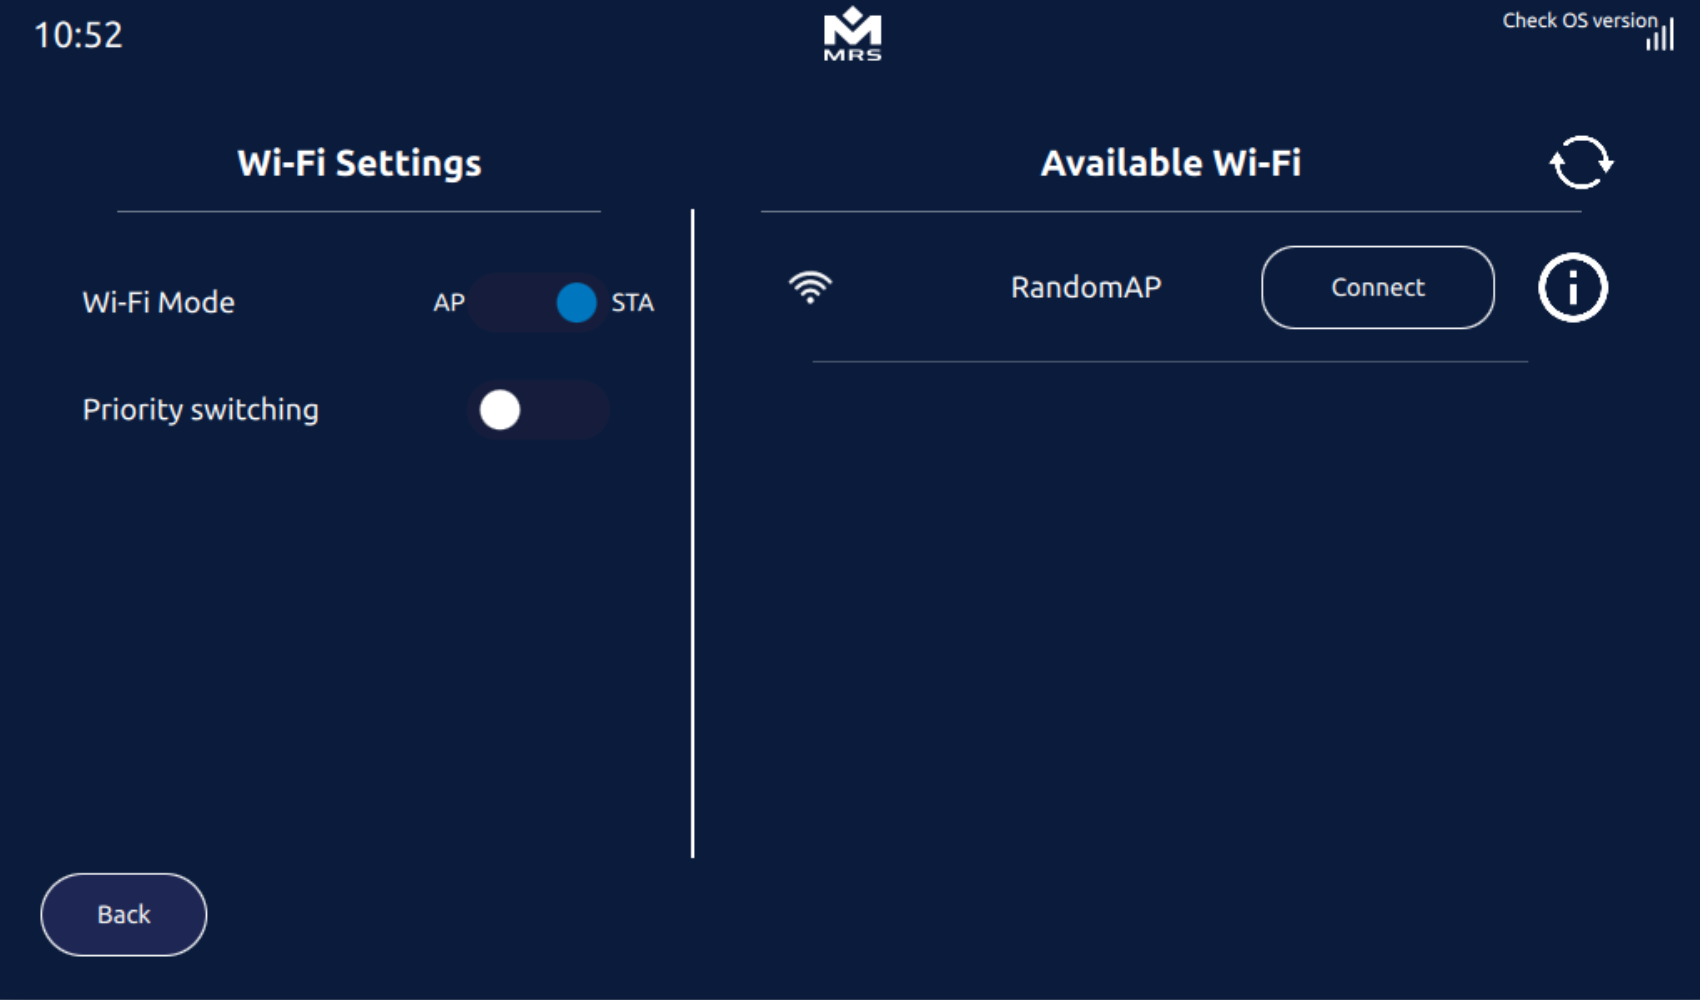
- The Wi-Fi Settings menu opens and displays several options, including Wi-Fi Mode, Priority switching, Wi-Fi scanning, and settings of the saved Access Points as shown in the image below:
 |
|---|
| Options in the Wi-Fi Settings Menu |
Wi-Fi Mode Switching
The Wi-Fi Mode switch allows the AP and STA modes to be switched. The backend utilizes the same steps defined in the Wi-Fi Module section. By default, the MConn Display with a built-in Wi-Fi module comes with AP mode. On switching to STA mode, it automatically scans available Wi-Fi Access Points and displays the list. The backend uses two Q_INVOKABLE functions to switch between the Wi-Fi modes.
Use the following QML functions to perform the Wi-Fi mode switching:
wifi.set_ap_mode()  // To switch to AP mode
wifi.set_sta_mode() // To switch to STA mode
Wi-Fi Priority Switching
Press the toggle button to turn on Wi-Fi priority switching. In this mode, MConn makes a passive Wi-Fi scan using wpa_cli supplicant at regular intervals of ten seconds for the available Wi-Fi Access Points. When MConn finds an access point with a higher priority than the current one, it switches to the new access point. On the backend, it uses two Q_INVOKABLE functions to start and stop priority Wi-Fi switching.
Use the following QML functions to perform Wi-Fi priority switching:
wifi.startPriorityWifiSwitching()//Start priority switching
wifi.endPriorityWifiSwitching() //Stop priority switching
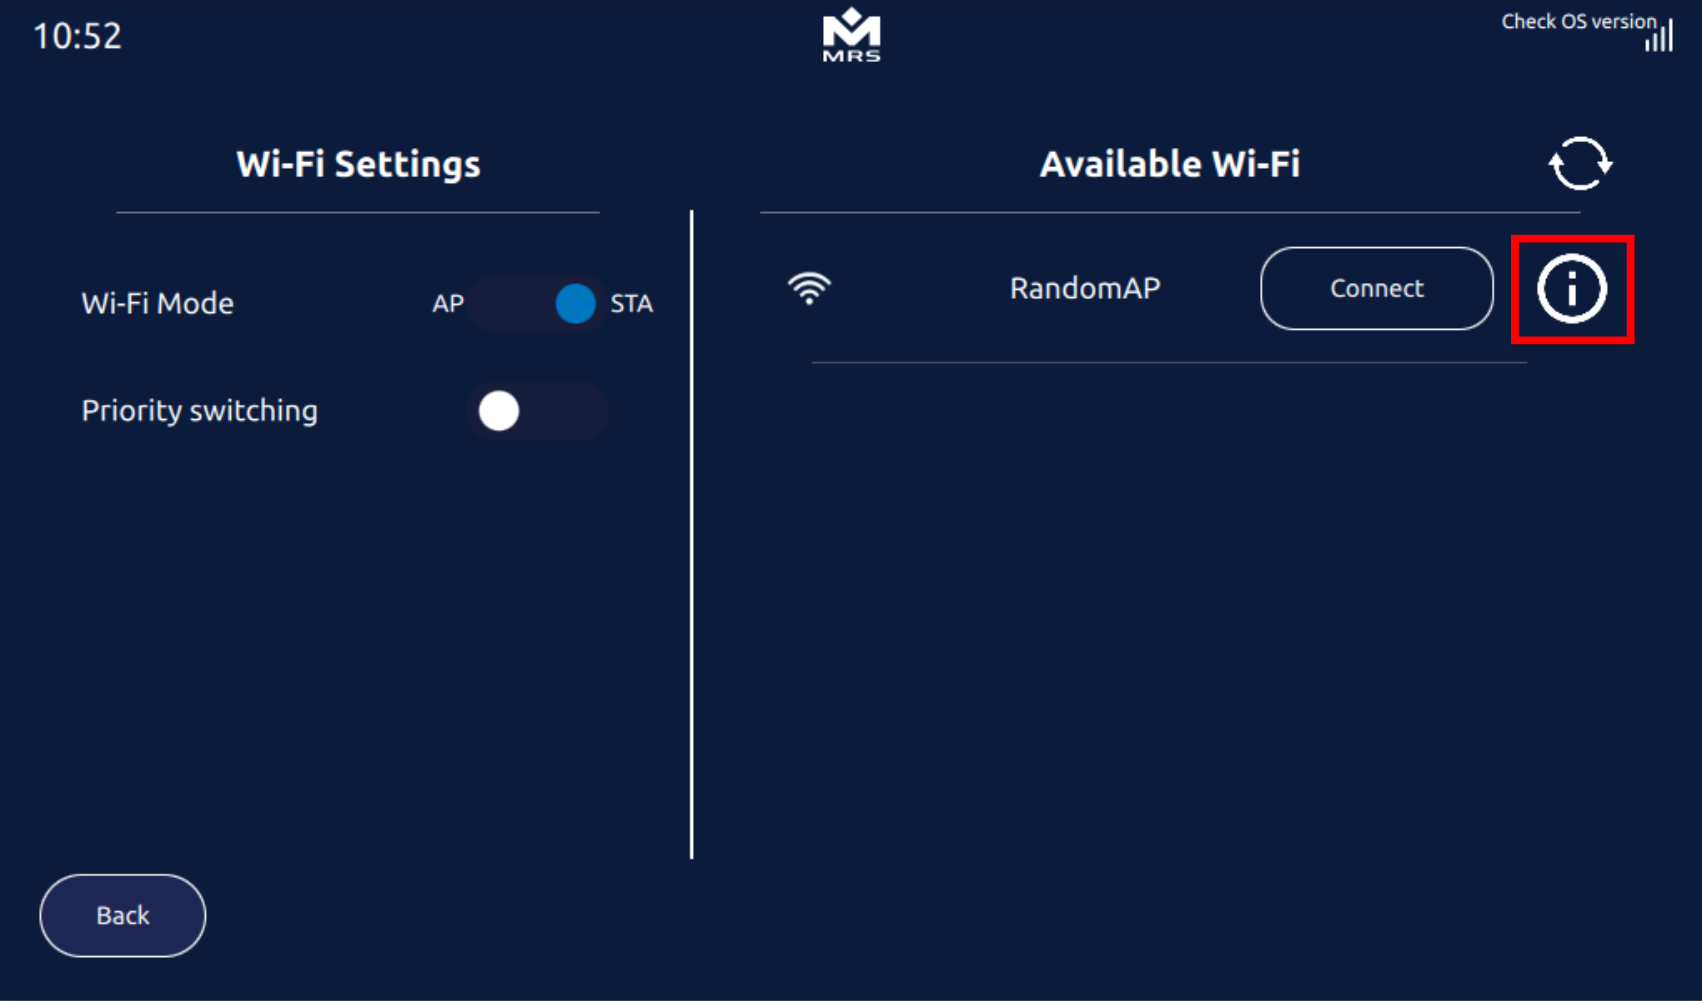
Wi-Fi Scanning
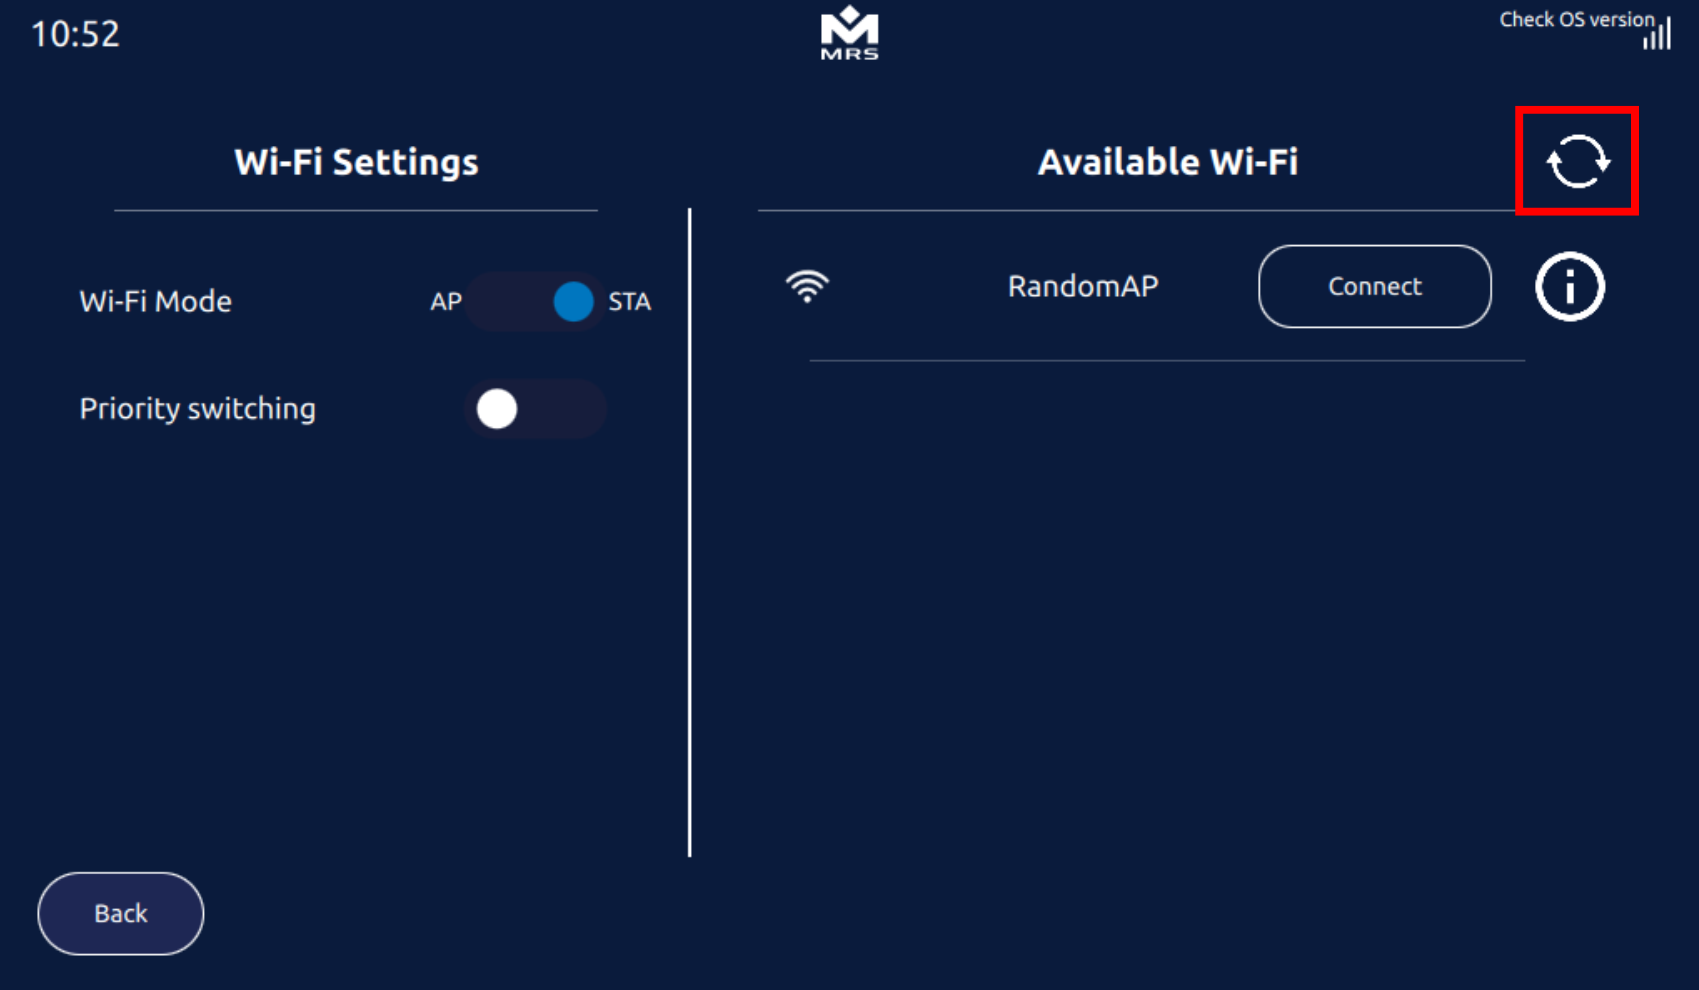
To scan for the available Wi-Fi Access Points, tap on the Refresh icon. On backend, it uses wpa_cli to scan for nearby Access Points. A list of available Access Points displays with options to connect to a specific point or to change the setting of the saved Access Points.
 |
|---|
| Wi-Fi Scanning Option in Wi-Fi Settings |
The Following QML function performs the Wi-Fi scanning:
if(wifi.wifiMode == "stamode")
{
wifiScanListModel.clear() // Clear model
wifiListBussyIndicator.running = true // For feedback
loadlistTimer.running = true //To read WiFi after some specific time
wifi.scan()  // start scanning
}
        Timer
        {
            id: loadlistTimer
            running: false
            interval: 3500
            onTriggered: {
                wifiScanListModel.clear()
                for (let i = 0; i < wifi.ssid_list.length; i++)
                {
                    wifiScanListModel.append({name: wifi.ssid_list[i]})//populate list model
                }
                wifiListBussyIndicator.running = false
                wifi.readRegisteredAccessPoints()
                wifi.get_status()
            }
        }
Settings of Saved Access Points
To change the settings of any of the saved Access Point(s) in the scanned list, press the Information icon. This opens the settings window for that specific Access Point, where you can update its priority, background scanning threshold, and password.
 |
|---|
| Settings of Saved Access Points |
Missing Interface Detection
The Display holds the functionality to detect the availability of an interface and provide feedback if a particular interface is missing. InterfaceStatus module in the Reference App keeps track of all the interfaces and shows their availability status through the following flags:
- Missing Network Interfaces
- Missing Interfaces Associated with the Menu Tab
Missing Network Interfaces
When the Display starts and any of the networking interfaces, such as Wi-Fi, Ethernet, or Bluetooth, is missing, a popup notification appears for two seconds to show their unavailability. Tap the close button on the right of the popup to close it manually.
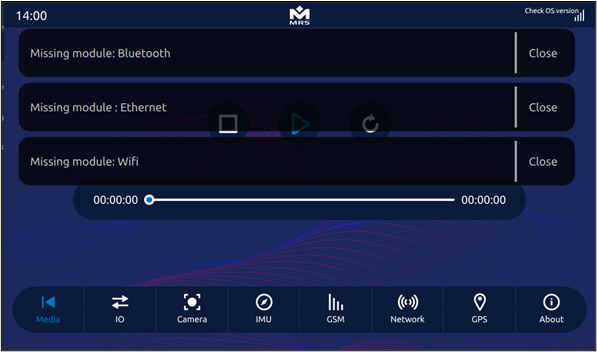 |
|---|
| Missing Network Interface Detection |
Missing Interfaces Associated to Menu Tab
Suppose any interfaces associated with the Reference App menu tab are missing. In that case, a black screen with the unavailability message appears on the respective tab, blocking all user interactions to avoid unwanted behavior.
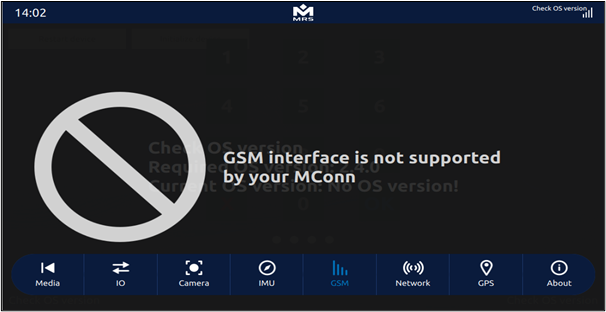 |
|---|
| Missing Interface Associated with the Menu Detection |
Touch Pointer
The MConn Display is equipped with the functionality to provide visual feedback upon a touch event. Every time you tap on the screen, a colored circular pointer appears. There is an option to enable or disable the touch pointer. Also, the Display allows the customization of the touch pointer in terms of its color, size, and opacity.
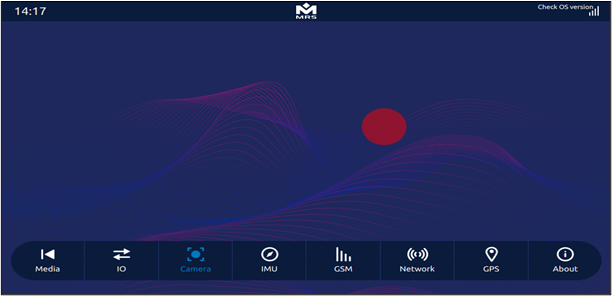 |
|---|
| MConn Touch Pointer |
To access the customization options of touch pointer, follow the steps below:
- Navigate to the About tab of the Reference App.
- Tap on the Touch Pointer Settings button.
 |
|---|
| Touch Pointer Settings button in the About tab |
- Update the touch pointer settings as per requirements.
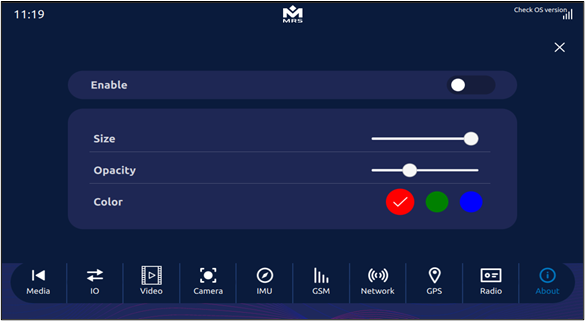 |
|---|
| Touch Pointer Settings |
 |
|---|
| To retain the user preferences for the Touch Pointer Settings, all settings are stored in the config file. |
PDF Viewer
The Reference App comes with the PDF Viewer tool for displaying PDF files' contents on the screen. The PDF Viewer consists of a toolbar with Zoom In/Out options and a Page Number entry box. It can be configured using C++ code and via QML.
Use the following C++ code to configure the PDF Viewer in the Reference App:
#include "pdfModel.h"
int main(int argc, char *argv[])
{
pdfFileProvider * pdfFile = new pdfFileProvider(m_app);
 engine->rootContext()->setContextProperty("fileExplorer", m_pdfFile);
qmlRegisterType<PdfModel>("MRSComponents", 1, 0, "PdfReader");
}
Use the following QML commands to configure the PDF Viewer:
PdfReader{
            id: pdfReader
	path = file:///Path/to/File
    }
ListView{
id: view
anchors.fill: parent
model: pdfReader.numPages
spacing : 10
delegate:  Image{
id: imagePdf
width: parent.width
source:pdfReader.loaded?"image://pdfReader/page/"+(modelData+1) : ""
sourceSize.width: width
visible:  pdfReader.loaded?1:0
                }
          }
spacing : 10
delegate:  Image{
id: imagePdf
width: parent.width
source:pdfReader.loaded?"image://pdfReader/page/"+(modelData+1) : ""
sourceSize.width: width
visible:  pdfReader.loaded?1:0
                }
          }
Video Player
The MConn comes with a video player. The Reference App video player holds play/pause and fast forward/rewind video functionalities. The video player supports the following video formats:
- Mp4
- Flv
- Mkv
- 3gp
Following are the commands to use the video player in QML:
  Video {
        id: video
        anchors.fill: parent
        source: "file:///rw_data/samplevideo.mp4"
        autoLoad: true
        autoPlay: false
        fillMode: VideoOutput.Stretch
      }
Date Time Settings
The Display comes with the functionality to set date and time. To access date and time setting component, follow the steps below:
- Open Control Panel by swiping down from the top.
- Tap on the Date time button to open the settings panel.
- Set the date and time as per requirements.
- Tap on the Set button to save the changes.
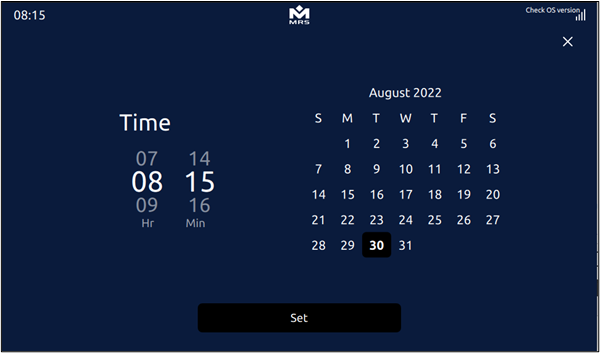 |
|---|
| Date and Time Component of MConn |
On backend, it uses simple Q_INVOKABLE setTimeDate function that uses the date command of Linux to set user-defined time and date.
| Important |
|---|
| The date must follow the MM/DD/YYYY format. |
Theme
The MConn Reference App comes with two in-built contrasting themes, which by default, is the Dark Theme. This information, along with some other configurations, is kept in the form of key value pairs loaded at startup from the following file:
/rw_data/app-config.ini
The variable REF_APP_THEME when set to 0 or 1 corresponds to dark or light theme for the Reference App, respectively. To change the theme of the Reference App, tap on the toggle button in the About tab:
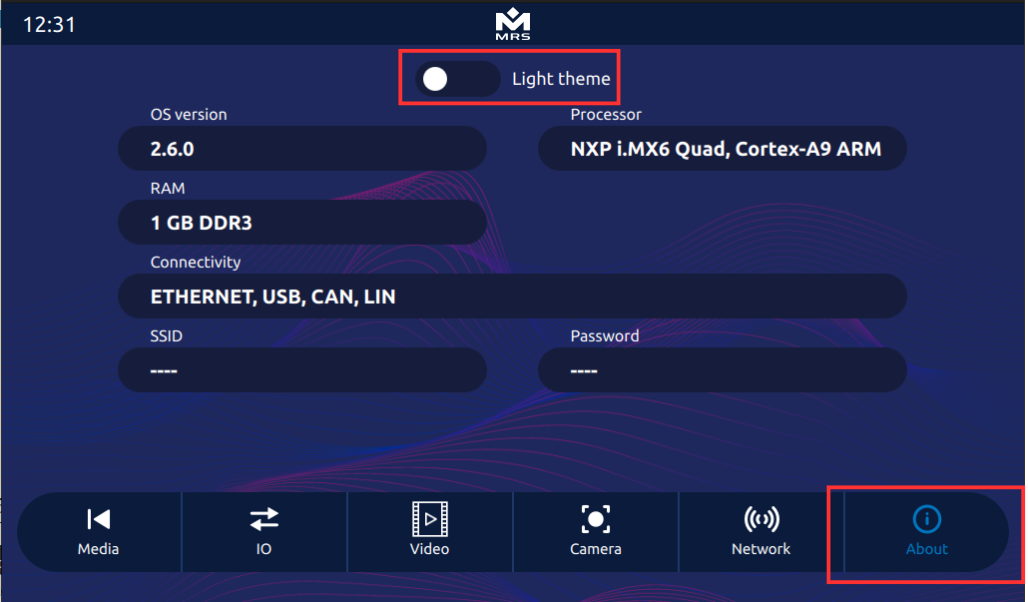 |
|---|
| Theme Toggle in the Reference App |
The light theme of the Reference App looks as follows:
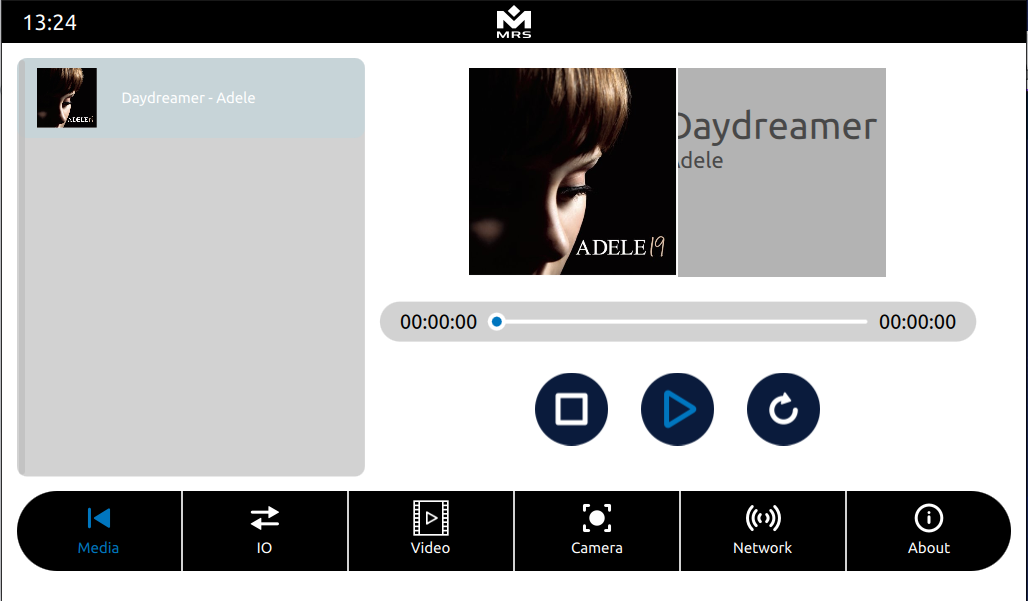 |
|---|
| Light Theme of the Reference App |